HomeAssistant Epaper Screen
I wanted to create a dashboard at a glance for me and the misses to look at for quick information with data from our home assistant instance.
Got the idea from someone’s similar setup on reddit, but it seems he sold hes idea to seeed studio and never shared any of the code or how it was created. Only what parts he used.
When the product was announced as well and was posted to r/homeassistant it was also deleted
So I decided to find out and create one myself and this is me sharing how I managed to build mine and what I learned.
Hardware
Seeed Studio hardware:
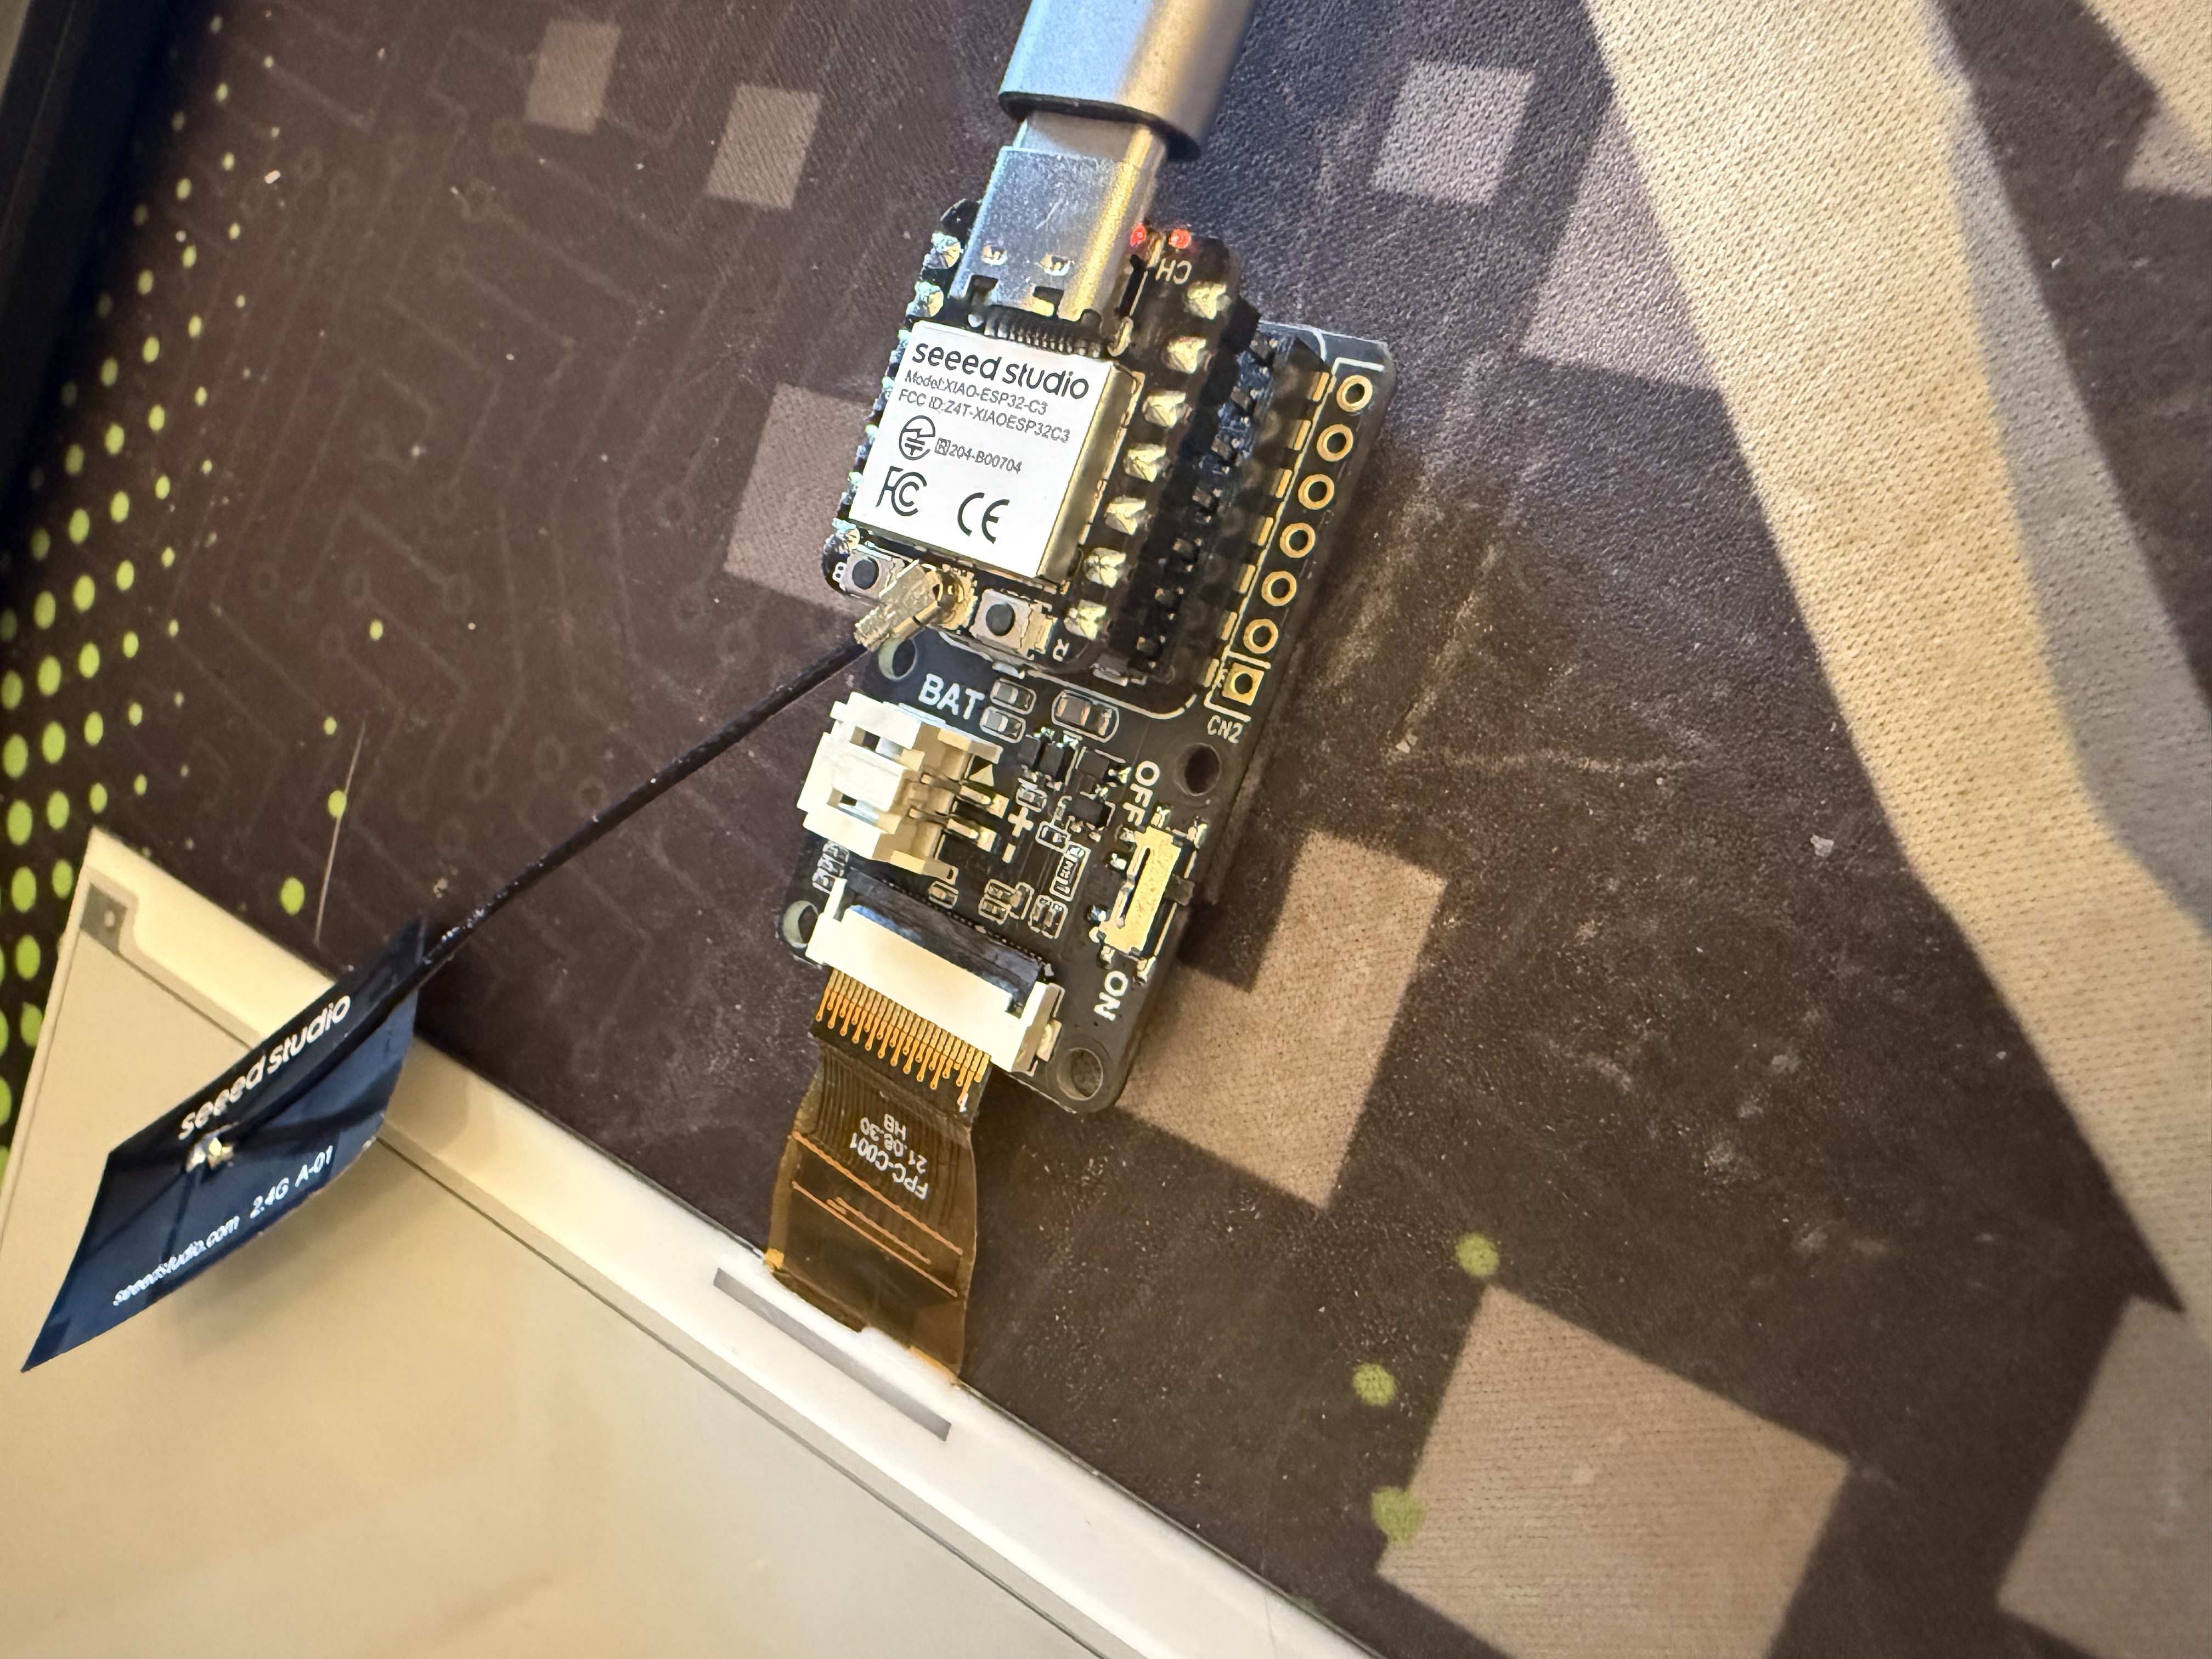
ePaper Breakout Board for Seeed Studio XIAO
Seeed Studio XIAO ESP32C3 (Pre-Soldered)
STL:
Figuring out what is been used.
From a quick google search it looks like what is been used is ESPHOME. ESPHome is a system which allows you to turn common microcontrollers into smart home devices. It uses YAML configuration files and, based on the content of these file(s), it creates custom firmware which you can then install directly onto your device.
Installing ESPHOME is quite simple and can be done by following this guide.
Reading in the documentation I found the following:
The
waveshare_epaperdisplay platform allows you to use some E-Paper displays sold by Waveshare with ESPHome.
But, I didn’t have a waveshare display, but one from Seeed Studio.
Getting the screen to run with ESPHOME
So I connected the devices together as seen on the picture below and tried with the example code provided in the documentation page.
# Example configuration entry
font:
  - file: 'fonts/Comic Sans MS.ttf'
    id: font1
    size: 8

spi:
  clk_pin: D0
  mosi_pin: D1

display:
  - platform: waveshare_epaper
    cs_pin: D2
    dc_pin: D3
    busy_pin: D4
    reset_pin: D5
    model: 2.90in
    full_update_every: 30
    lambda: |-
      it.print(0, 0, id(font1), "Hello World!");
No dice on first attempt, so i looked up the SPI pin layout to make sure that they where correct.
Looking at the schematic from seeed, the pins looks like this on the ESP32C3.

And looking at Seeed only code samples for the display I created this mapping:
| ePaper SPI Pins | XIAO |
|---|---|
| RST | D0 |
| CS | D1 |
| DC | D3 |
| BUSY | D2 |
| SCK | D8 |
| MOSI | D10 |
| 3V3 | 3V3 |
| GND | GND |
So ended up with the following SPI settings:
font:
  - file: 'fonts/Comic Sans MS.ttf'
    id: font1
    size: 8

spi:
  clk_pin: GPIO8
  mosi_pin: GPIO10
  id: spi_stack

display:
  - platform: waveshare_epaper
    id: screen
    cs_pin: GPIO3
    dc_pin: GPIO5
    busy_pin: GPIO7
    reset_pin: GPIO2
    spi_id: spi_stack
    model: ??????
    full_update_every: 30
    lambda: |-
      it.print(0, 0, id(font1), "Hello World!");
Now we only need to find the model to use, the ESPHOME documentation shows support for the following models:
7.30in-f- 7.3in 7-color display (black, white, red, yellow, blue, green, and orange)7.50in7.50in-bV2- also supports v3, B/W rendering only7.50in-bV3- display with the ‘(V3)’ sticker on the back, B/W rendering only7.50in-bV3-bwr- display with the ‘(V3)’ sticker on the back, BWR rendering enabled (uses double the amount of RAM for the display buffer as B/W rendering)7.50in-bc- display with version sticker ‘(C)’ on the back, B/W rendering only7.50inV2- Can’t use with an ESP8266 as it runs out of RAM7.50inV2alt(alternative version to the above7.50inV2)7.50inV2p- Support for partial refresh and fast refresh (Only suitable for7.50inV2models manufactured after September 2023)7.50in-hd-b- Can’t use with an ESP8266 as it runs out of RAM
I ended up trying all of this and the only one that actually displayed anything on the screen was 7.50inV2, but it was really really faint.

I did ask for if anyone had experienced this issue on the Seeed discord, I was quickly contacted by a seeed employee that asked if I could send pictures of the breakout board. He quickly noticed that it was defect and prepared an support case where they sent me a new board. 5 days later I got the new board delivered. Swapped it out and put power to the ESP32C3 device and it showed me this:

Now we are cooking!
The YAML so far:
font:
  - file: 'fonts/Comic Sans MS.ttf'
    id: font1
    size: 8
spi:
  clk_pin: GPIO8
  mosi_pin: GPIO10
  id: spi_stack
display:
  - platform: waveshare_epaper
    id: screen
    cs_pin: GPIO3
    dc_pin: GPIO5
    busy_pin: GPIO7
    reset_pin: GPIO2
    spi_id: spi_stack
    model: 7.50inv2
    update_interval: never
	reset_duration: 2ms
	rotation: 0
    lambda: |-
      it.print(400, 220, id(font1), "Hello!");
Now for the fancy stuff!
So how do we make it print fancy stuff and make it pretty. ESPHOME documentation was quite helpful here, especially the Display Core documentation and the Font Renderer.
Something that got linked to me from the user Ordo273 I have been talking to on reddit DM’s about this project could have helped me a lot when I was doing this project.
But, he linked me a Display Simulator created by someone called mat932

If I know about this before i was sitting their adjusting and flashing to the ESP32 microcontroller for each change to see the results, I could have saved myself some time and about 500 re-flashes.
The site gives you a quick way to test the display functions ( with some limitations ).
Fonts
The Fonts I ended up using in my setup was the following
font:
- file: "fonts/GoogleSans-Medium.ttf"
id: font_date
size: 58
- file: "fonts/GoogleSans-Medium.ttf"
id: font_35
size: 35
- file: "fonts/GoogleSans-Bold.ttf"
id: font_time
size: 105
- file: "fonts/GoogleSans-Bold.ttf"
id: font_value
size: 50
- file: "fonts/GoogleSans-Bold.ttf"
id: font_value_small
size: 40
- file: "fonts/GoogleSans-Bold.ttf"
id: font_stock_title
size: 40
- file: "fonts/GoogleSans-Bold.ttf"
id: font_stock_price
size: 60
- file: "fonts/GoogleSans-Bold.ttf"
id: font_stock_price_small
size: 50
- file: "fonts/GoogleSans-Medium.ttf"
id: font_stock_highlow
size: 30
- file: "gfonts://Inter@900"
id: big
size: 120
- file: "gfonts://Inter@900"
id: medium
size: 60
- file: "gfonts://Inter@700"
id: small
size: 30
- file: "gfonts://Inter@700"
id: tiny
size: 24
extras:
- file: "fonts/mdi.ttf"
glyphs: [
"\U000F0590", # weather-cloudy
"\U000F0F2F", # weather-cloudy-alert
"\U000F0E6E", # weather-cloudy-arrow-right
"\U000F0591", # weather-fog
"\U000F0592", # weather-hail
"\U000F0F30", # weather-hazy
"\U000F0898", # weather-hurricane
"\U000F0593", # weather-lightning
"\U000F067E", # weather-lightning-rainy
"\U000F0594", # weather-night
"\U000F0F31", # weather-night-partly-cloudy
"\U000F0595", # weather-partly-cloudy
"\U000F0F32", # weather-partly-lightning
"\U000F0F33", # weather-partly-rainy
"\U000F0F34", # weather-partly-snowy
"\U000F0F35", # weather-partly-snowy-rainy
"\U000F0596", # weather-pouring
"\U000F0597", # weather-rainy
"\U000F0598", # weather-snowy
"\U000F0F36", # weather-snowy-heavy
"\U000F067F", # weather-snowy-rainy
"\U000F0599", # weather-sunny
"\U000F0F37", # weather-sunny-alert
"\U000f14e4", # weather-sunny-off
"\U000F059A", # weather-sunset
"\U000F059B", # weather-sunset-down
"\U000F059C", # weather-sunset-up
"\U000F0F38", # weather-tornado
"\U000F059D", # weather-windy
"\U000F059E", # weather-windy-variant
"\U000F181E", # mdi-door-sliding
"\U000F1820", # mdi-door-sliding-open
"\U000F171D", # mdi-fan-auto
"\U000F081D", # mdi-fan-off
"\U000F0210", # mdi-fan
"\U000F0567", # mdi-video
"\U000F0568", # mdi-video-off
"\U000F044B", # mdi-record-rec
"\U000F0004", # mdi-account
"\U000F0012", # mdi-account-off
"\U000F00EB", # mdi-cake-Variant
"\U000F17FF", # mdi-sun-wireless-outline
"\U000F011B", # mdi-cat
]
- file: "fonts/mdi.ttf"
id: font_mdi_large
size: 200
glyphs: [
"\U000F0590", # weather-cloudy
"\U000F0F2F", # weather-cloudy-alert
"\U000F0E6E", # weather-cloudy-arrow-right
"\U000F0591", # weather-fog
"\U000F0592", # weather-hail
"\U000F0F30", # weather-hazy
"\U000F0898", # weather-hurricane
"\U000F0593", # weather-lightning
"\U000F067E", # weather-lightning-rainy
"\U000F0594", # weather-night
"\U000F0F31", # weather-night-partly-cloudy
"\U000F0595", # weather-partly-cloudy
"\U000F0F32", # weather-partly-lightning
"\U000F0F33", # weather-partly-rainy
"\U000F0F34", # weather-partly-snowy
"\U000F0F35", # weather-partly-snowy-rainy
"\U000F0596", # weather-pouring
"\U000F0597", # weather-rainy
"\U000F0598", # weather-snowy
"\U000F0F36", # weather-snowy-heavy
"\U000F067F", # weather-snowy-rainy
"\U000F0599", # weather-sunny
"\U000F0F37", # weather-sunny-alert
"\U000f14e4", # weather-sunny-off
"\U000F059A", # weather-sunset
"\U000F059B", # weather-sunset-down
"\U000F059C", # weather-sunset-up
"\U000F0F38", # weather-tornado
"\U000F059D", # weather-windy
"\U000F059E", # weather-windy-variant
"\U000F181E", # mdi-door-sliding
"\U000F1820", # mdi-door-sliding-open
"\U000F171D", # mdi-fan-auto
"\U000F081D", # mdi-fan-off
"\U000F0210", # mdi-fan
"\U000F0567", # mdi-video
"\U000F0568", # mdi-video-off
"\U000F044B", # mdi-record-rec
"\U000F0004", # mdi-account
"\U000F0012", # mdi-account-off
"\U000F00EB", # mdi-cake-Variant
"\U000F17FF", # mdi-sun-wireless-outline
"\U000F011B", # mdi-cat
]
- file: "fonts/mdi.ttf"
id: font_mdi_medium
size: 40
glyphs: [
"\U000F0590", # weather-cloudy
"\U000F0F2F", # weather-cloudy-alert
"\U000F0E6E", # weather-cloudy-arrow-right
"\U000F0591", # weather-fog
"\U000F0592", # weather-hail
"\U000F0F30", # weather-hazy
"\U000F0898", # weather-hurricane
"\U000F0593", # weather-lightning
"\U000F067E", # weather-lightning-rainy
"\U000F0594", # weather-night
"\U000F0F31", # weather-night-partly-cloudy
"\U000F0595", # weather-partly-cloudy
"\U000F0F32", # weather-partly-lightning
"\U000F0F33", # weather-partly-rainy
"\U000F0F34", # weather-partly-snowy
"\U000F0F35", # weather-partly-snowy-rainy
"\U000F0596", # weather-pouring
"\U000F0597", # weather-rainy
"\U000F0598", # weather-snowy
"\U000F0F36", # weather-snowy-heavy
"\U000F067F", # weather-snowy-rainy
"\U000F0599", # weather-sunny
"\U000F0F37", # weather-sunny-alert
"\U000F14E4", # weather-sunny-off
"\U000F059A", # weather-sunset
"\U000F059B", # weather-sunset-down
"\U000F059C", # weather-sunset-up
"\U000F0F38", # weather-tornado
"\U000F059D", # weather-windy
"\U000F059E", # weather-windy-variant
"\U000F181E", # mdi-door-sliding
"\U000F1820", # mdi-door-sliding-open
"\U000F171D", # mdi-fan-auto
"\U000F081D", # mdi-fan-off
"\U000F0210", # mdi-fan
"\U000F0567", # mdi-video
"\U000F0568", # mdi-video-off
"\U000F044B", # mdi-record-rec
"\U000F0004", # mdi-account
"\U000F0012", # mdi-account-off
"\U000F00EB", # mdi-cake-Variant
"\U000F17FF", # mdi-sun-wireless-outline
"\U000F011B", # mdi-cat
]
- file: "fonts/mdi.ttf"
id: font_mdi_side_high
size: 80
glyphs: [
"\U000F0590", # weather-cloudy
"\U000F0F2F", # weather-cloudy-alert
"\U000F0E6E", # weather-cloudy-arrow-right
"\U000F0591", # weather-fog
"\U000F0592", # weather-hail
"\U000F0F30", # weather-hazy
"\U000F0898", # weather-hurricane
"\U000F0593", # weather-lightning
"\U000F067E", # weather-lightning-rainy
"\U000F0594", # weather-night
"\U000F0F31", # weather-night-partly-cloudy
"\U000F0595", # weather-partly-cloudy
"\U000F0F32", # weather-partly-lightning
"\U000F0F33", # weather-partly-rainy
"\U000F0F34", # weather-partly-snowy
"\U000F0F35", # weather-partly-snowy-rainy
"\U000F0596", # weather-pouring
"\U000F0597", # weather-rainy
"\U000F0598", # weather-snowy
"\U000F0F36", # weather-snowy-heavy
"\U000F067F", # weather-snowy-rainy
"\U000F0599", # weather-sunny
"\U000F0F37", # weather-sunny-alert
"\U000F14E4", # weather-sunny-off
"\U000F059A", # weather-sunset
"\U000F059B", # weather-sunset-down
"\U000F059C", # weather-sunset-up
"\U000F0F38", # weather-tornado
"\U000F059D", # weather-windy
"\U000F059E", # weather-windy-variant
"\U000F181E", # mdi-door-sliding
"\U000F1820", # mdi-door-sliding-open
"\U000F171D", # mdi-fan-auto
"\U000F081D", # mdi-fan-off
"\U000F0210", # mdi-fan
"\U000F0567", # mdi-video
"\U000F0568", # mdi-video-off
"\U000F044B", # mdi-record-rec
"\U000F0004", # mdi-account
"\U000F0012", # mdi-account-off
"\U000F00EB", # mdi-cake-Variant
"\U000F17FF", # mdi-sun-wireless-outline
"\U000F011B", # mdi-cat
]
- file: 'fonts/mdi.ttf'
id: mdi_wifi
size: 25
glyphs: [
'', # mdi-wifi-strength-alert-outline
'', # mdi-wifi-strength-1
'', # mdi-wifi-strength-2
'', # mdi-wifi-strength-3
'' # mdi-wifi-strength-4
]
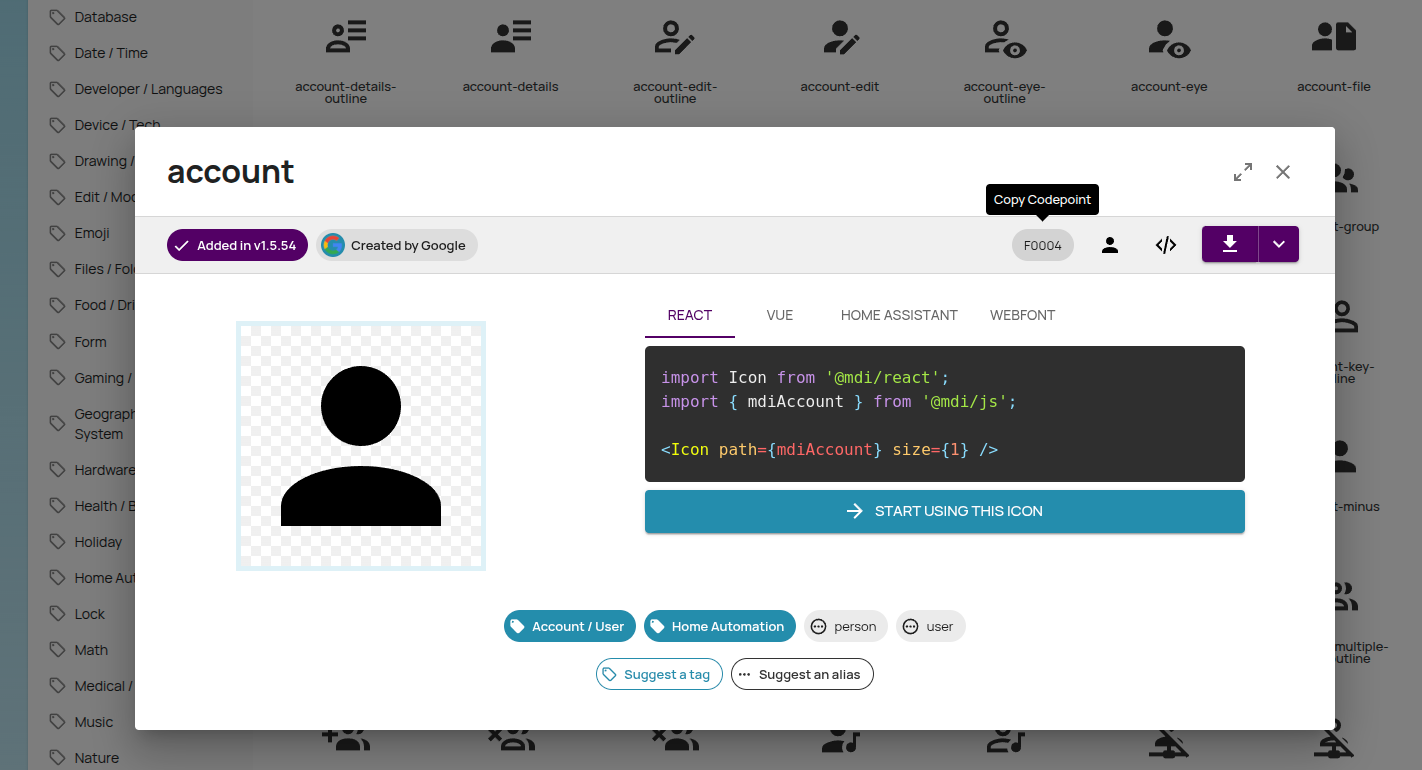
As you can see I have a font called mdi.ttf, this font is the icon font set that is used inside home assistant and can be found here
The ttf file is placed under /homeassistant/esphome/fonts

As a example:
“\U000F0004”, # mdi-account
the last digest according to the page is F0004 for the account icon.
That way you can use the icons in the strings like so in the lamda part in the display code:
it.printf(525,190,id(font_mdi_medium),TextAlign::CENTER_HORIZONTAL,"\U000F0004");
Sensor data
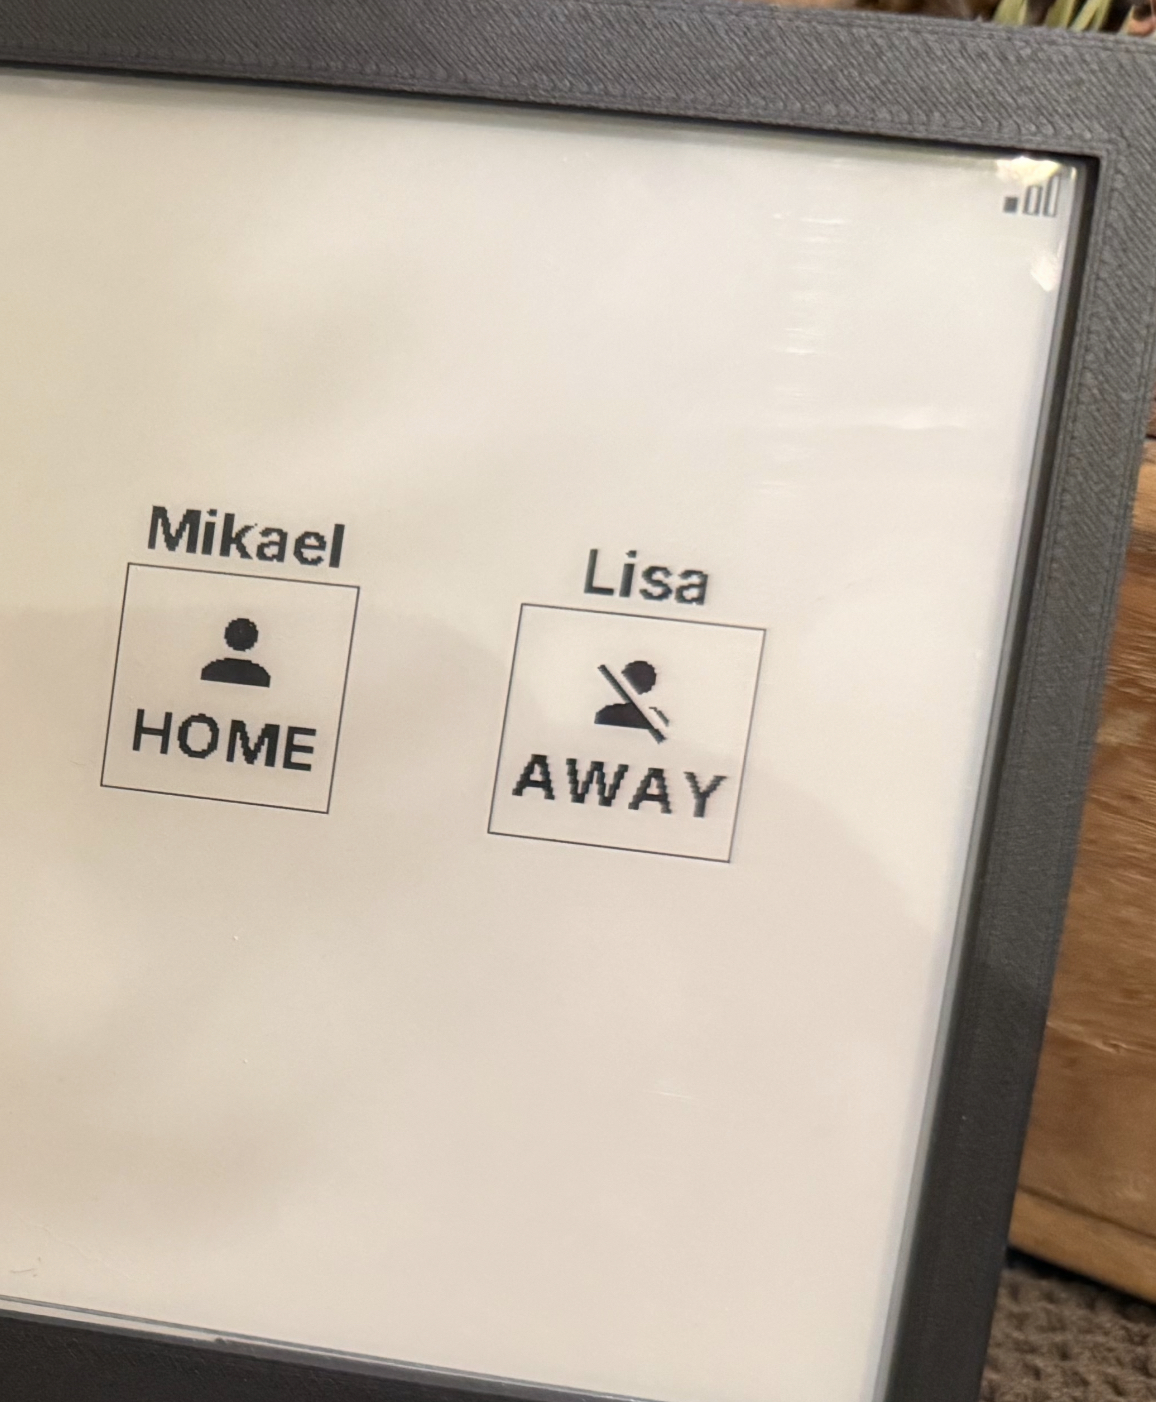
To display sensor data like is Mikael home you can do the following:
text_sensor:
  - platform: homeassistant
	id: person_mikael
	entity_id: person.duux
That way you can change the printf to the following:
std::map<std::string, std::string> person_map
{
	{"home", "\U000F0004"},
	{"not_home", "\U000F0012"},
};
it.printf(523,150, id(tiny), TextAlign::CENTER_HORIZONTAL, "Mikael");
it.printf(525,190,id(font_mdi_medium),TextAlign::CENTER_HORIZONTAL,"%s",person_map[id(person_mikael).state.c_str()].c_str());
What this code does is create a mapping of what to display based on value of the state from the sensor. This mapping is defined in the std::map array defined first.
Then it will print out Mikael as test then the icon under the text.
person_map[id(person_mikael).state.c_str()].c_str()
The printf function expects a string (%s) and the code last in the function listed below will look in the person_map with the value from the sensor id called person_mikaeland convert that to a c_str
Now it will show the account icon or the account-off icon from the mdi font based on the state of that sensor.
You can also add if/else statement in the code like this:
if (id(person_mikael).state == "home") {
	it.printf(525,230,id(tiny),TextAlign::CENTER_HORIZONTAL, "HOME");
}
else {
	it.printf(525,230,id(tiny),TextAlign::CENTER_HORIZONTAL, "AWAY");
}
Another good example of this is if you want to create a WiFi Signal Strength indicator on the top right corner of the screen:
/* WiFi Signal Strength */
if(id(wifisignal).has_state()) {
int x = 790;
int y = 20;
if (id(wifisignal).state >= -50) {
//Excellent
it.print(x, y, id(mdi_wifi), TextAlign::BASELINE_CENTER, "");
ESP_LOGI("WiFi", "Exellent");
} else if (id(wifisignal).state >= -60) {
//Good
it.print(x, y, id(mdi_wifi), TextAlign::BASELINE_CENTER, "");
ESP_LOGI("WiFi", "Good");
} else if (id(wifisignal).state >= -75) {
//Fair
it.print(x, y, id(mdi_wifi), TextAlign::BASELINE_CENTER, "");
ESP_LOGI("WiFi", "Fair");
} else if (id(wifisignal).state >= -100) {
//Weak
it.print(x, y, id(mdi_wifi), TextAlign::BASELINE_CENTER, "");
ESP_LOGI("WiFi", "Weak");
} else {
//Unlikely working signal
it.print(x, y, id(mdi_wifi), TextAlign::BASELINE_CENTER, "");
ESP_LOGI("WiFi", "Unlikely");
}
}
And then add a sensor for it by adding the following code:
sensor:
  - platform: wifi_signal
	name: "WiFi Signal Sensor"
	id: wifisignal
	update_interval: 60s
Draw a box
Now lets draw a box around it to make it more fancy
it.rectangle(480,180,90,90);
This command will draw a box with the first to numbers representing the top left corner of the box and the last to been the increase of the pixel count for the right bottom corner of the box.
Lets get more advanced
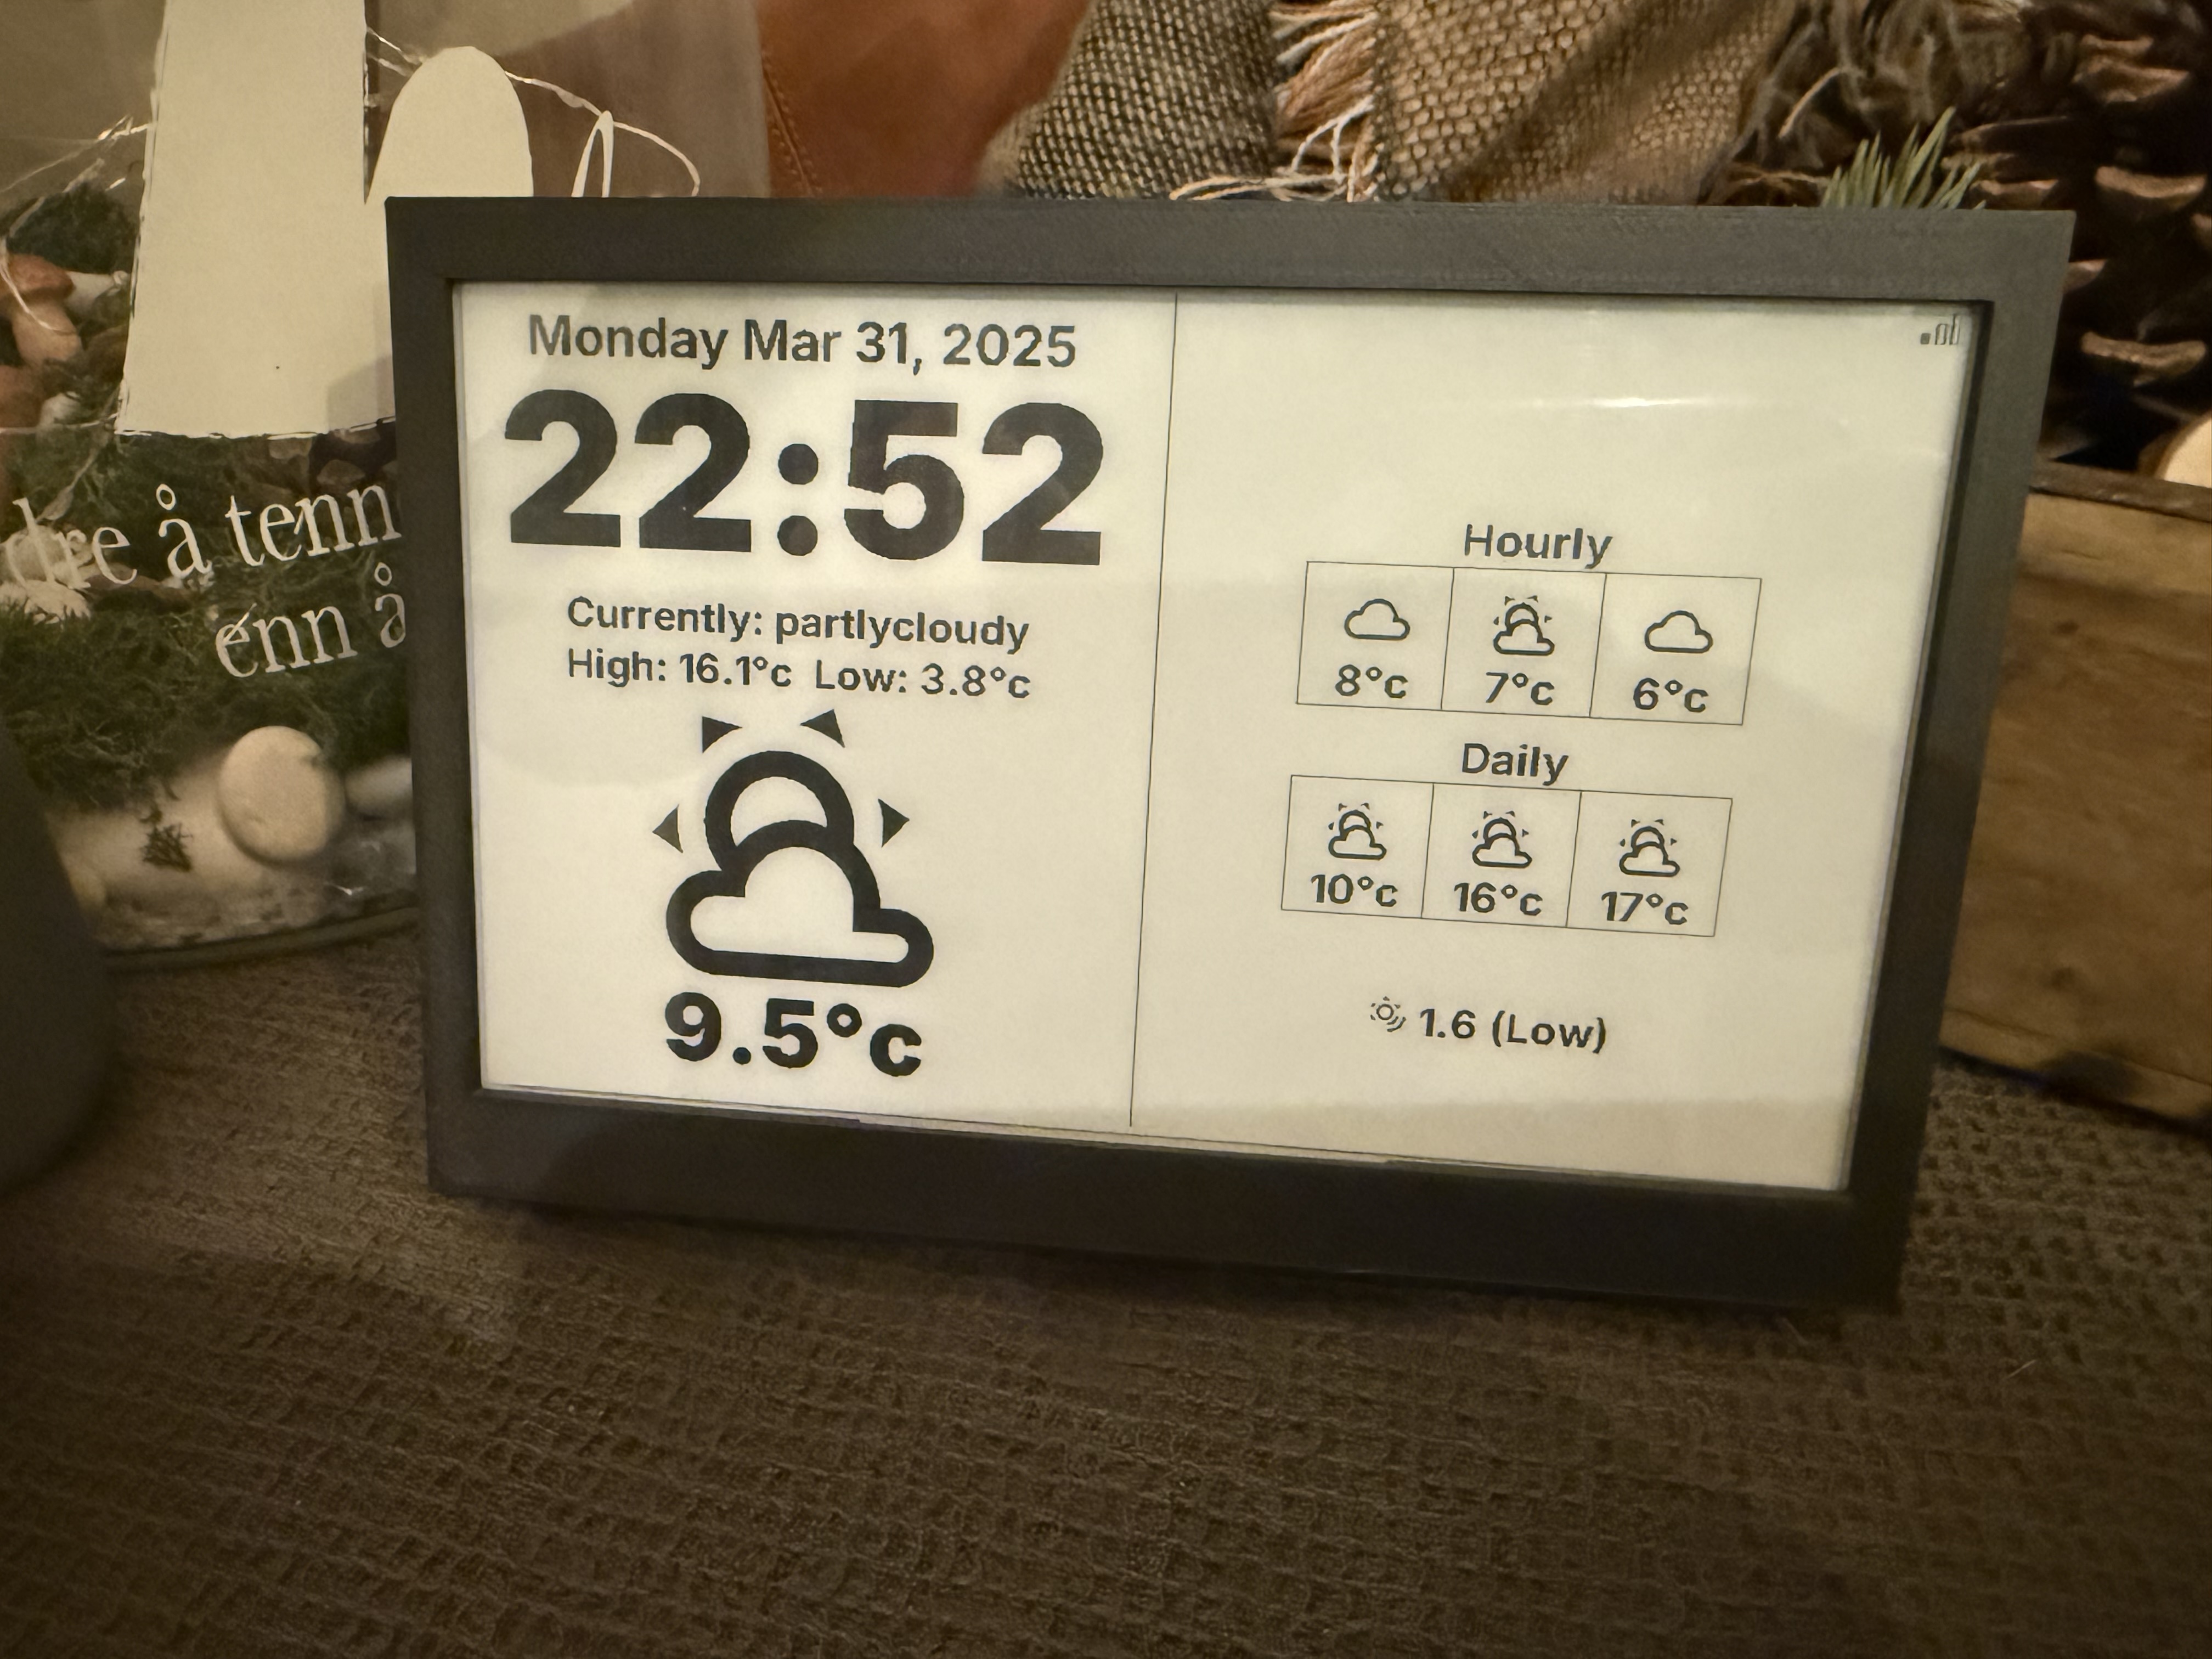
Now that’s cool, but lets get even more advanced as we want to be able to display time, date, weather, forecasts, temperature and even more sensors. And create pages instead of cluttering the screen.
Time and Date
To be able to display the time and date we need to provide a sensor for it.
First we define a time sensor that is connected to the home assistant time.
time:
  - platform: homeassistant
	id: homeassistant_time
Then we can use the strftime function instead of print to display the time in the format we want. In my case it will look like this:
// Date and Time
it.strftime(190, 10, id(small), TextAlign::CENTER_HORIZONTAL, "%A %b %d, %Y", id(homeassistant_time).now());
it.strftime(190, 30, id(big), TextAlign::CENTER_HORIZONTAL, "%H:%M", id(homeassistant_time).now());
Weather
To get the weather in as a sensor I needed to add some manual sensors for some reasons.
Might be due to my home assistant setup and what I use as a weather service.
To add this as manual settings you need to add the following YAML in to the configuration.yaml in home assistant.
Its located under /homeassistant directory.
Depending on your already configuration, but since I don’t have any other template setup I added this:
template: !include forecast.yaml
the forecast.yaml file has the following data in it to create the sensors I need:
- trigger:
    - platform: event #update at startup#
      event_type: homeassistant_started
    - platform: time_pattern
      hours: /1 #then update every hour#
  action:
    - service: weather.get_forecasts #update hourly forecasts#
      target:
        entity_id: weather.forecast_home #replace with your own weather integration
      data:
        type: hourly
      response_variable: hourly
    - service: weather.get_forecasts #update daily forecasts#
      target:
        entity_id: weather.forecast_home
      data:
        type: daily
      response_variable: daily
  sensor:
    #Sensors for current weather data#
    - name: "WeatherCurrent"
      state: "{{ states('weather.forecast_home') }}"
    - name: "TempCurrent"
      unit_of_measurement: "°C"
      state: >
        {{ state_attr('weather.forecast_home', 'temperature') }}
    #Sensors for forecast weather data#
    - name: Weather Forecast H1
      unique_id: weather_forecast_h1
      state: "{{ hourly['weather.forecast_home'].forecast[0].condition }}" #'hourly' pulls hourly forecasts, [0] = next hour's forecast
    - name: Temperature Forecast H1
      unique_id: temperature_forecast_h1
      state: "{{ hourly['weather.forecast_home'].forecast[0].temperature }}"
      unit_of_measurement: °C
    - name: Weather Forecast H2
      unique_id: weather_forecast_h2
      state: "{{ hourly['weather.forecast_home'].forecast[1].condition }}" # [1] = weather in 2 hours
    - name: Temperature Forecast H2
      unique_id: temperature_forecast_h2
      state: "{{ hourly['weather.forecast_home'].forecast[1].temperature }}"
      unit_of_measurement: °C
    - name: Weather Forecast H3
      unique_id: weather_forecast_h3
      state: "{{ hourly['weather.forecast_home'].forecast[2].condition }}"
    - name: Temperature Forecast H3
      unique_id: temperature_forecast_h3
      state: "{{ hourly['weather.forecast_home'].forecast[2].temperature }}"
      unit_of_measurement: °C
    - name: Weather Forecast D1
      unique_id: weather_forecast_d1
      state: "{{ daily['weather.forecast_home'].forecast[0].condition }}" #'daily' pulls daily forecasts, [0] = tomorrow's forecast
    - name: Temperature Forecast D1
      unique_id: temperature_forecast_d1
      state: "{{ daily['weather.forecast_home'].forecast[0].temperature }}"
      unit_of_measurement: °C
    - name: Weather Forecast D2
      unique_id: weather_forecast_d2
      state: "{{ daily['weather.forecast_home'].forecast[1].condition }}" # [1] = forecast day after tomorrow
    - name: Temperature Forecast D2
      unique_id: temperature_forecast_d2
      state: "{{ daily['weather.forecast_home'].forecast[1].temperature }}"
      unit_of_measurement: °C
    - name: Weather Forecast D3
      unique_id: weather_forecast_d3
      state: "{{ daily['weather.forecast_home'].forecast[2].condition }}"
    - name: Temperature Forecast D3
      unique_id: temperature_forecast_d3
      state: "{{ daily['weather.forecast_home'].forecast[2].temperature }}"
      unit_of_measurement: °C
- trigger:
    - platform: event #update at startup#
      event_type: homeassistant_started
    - platform: time_pattern
      #  at: "00:01:00"
      hours: /1
  action:
    - service: weather.get_forecasts
      target:
        entity_id: weather.forecast_home
      data:
        type: hourly
      response_variable: hourly
  sensor:
    #Sensors for forecast weather data for each hour of the day#
    - name: Temperature Forecast 01
      unique_id: temperature_forecast_01
      state: "{{ hourly['weather.forecast_home'].forecast[0].temperature }}"
      unit_of_measurement: °C
    - name: Temperature Forecast 02
      unique_id: temperature_forecast_02
      state: "{{ hourly['weather.forecast_home'].forecast[1].temperature }}"
      unit_of_measurement: °C
    - name: Temperature Forecast 03
      unique_id: temperature_forecast_03
      state: "{{ hourly['weather.forecast_home'].forecast[2].temperature }}"
      unit_of_measurement: °C
    - name: Temperature Forecast 04
      unique_id: temperature_forecast_04
      state: "{{ hourly['weather.forecast_home'].forecast[3].temperature }}"
      unit_of_measurement: °C
    - name: Temperature Forecast 05
      unique_id: temperature_forecast_05
      state: "{{ hourly['weather.forecast_home'].forecast[4].temperature }}"
      unit_of_measurement: °C
    - name: Temperature Forecast 06
      unique_id: temperature_forecast_06
      state: "{{ hourly['weather.forecast_home'].forecast[5].temperature }}"
      unit_of_measurement: °C
    - name: Temperature Forecast 07
      unique_id: temperature_forecast_07
      state: "{{ hourly['weather.forecast_home'].forecast[6].temperature }}"
      unit_of_measurement: °C
    - name: Temperature Forecast 08
      unique_id: temperature_forecast_08
      state: "{{ hourly['weather.forecast_home'].forecast[7].temperature }}"
      unit_of_measurement: °C
    - name: Temperature Forecast 09
      unique_id: temperature_forecast_09
      state: "{{ hourly['weather.forecast_home'].forecast[8].temperature }}"
      unit_of_measurement: °C
    - name: Temperature Forecast 10
      unique_id: temperature_forecast_10
      state: "{{ hourly['weather.forecast_home'].forecast[9].temperature }}"
      unit_of_measurement: °C
    - name: Temperature Forecast 11
      unique_id: temperature_forecast_11
      state: "{{ hourly['weather.forecast_home'].forecast[10].temperature }}"
      unit_of_measurement: °C
    - name: Temperature Forecast 12
      unique_id: temperature_forecast_12
      state: "{{ hourly['weather.forecast_home'].forecast[11].temperature }}"
      unit_of_measurement: °C
    - name: Temperature Forecast 13
      unique_id: temperature_forecast_13
      state: "{{ hourly['weather.forecast_home'].forecast[12].temperature }}"
      unit_of_measurement: °C
    - name: Temperature Forecast 14
      unique_id: temperature_forecast_14
      state: "{{ hourly['weather.forecast_home'].forecast[13].temperature }}"
      unit_of_measurement: °C
    - name: Temperature Forecast 15
      unique_id: temperature_forecast_15
      state: "{{ hourly['weather.forecast_home'].forecast[14].temperature }}"
      unit_of_measurement: °C
    - name: Temperature Forecast 16
      unique_id: temperature_forecast_16
      state: "{{ hourly['weather.forecast_home'].forecast[15].temperature }}"
      unit_of_measurement: °C
    - name: Temperature Forecast 17
      unique_id: temperature_forecast_17
      state: "{{ hourly['weather.forecast_home'].forecast[16].temperature }}"
      unit_of_measurement: °C
    - name: Temperature Forecast 18
      unique_id: temperature_forecast_18
      state: "{{ hourly['weather.forecast_home'].forecast[17].temperature }}"
      unit_of_measurement: °C
    - name: Temperature Forecast 19
      unique_id: temperature_forecast_19
      state: "{{ hourly['weather.forecast_home'].forecast[18].temperature }}"
      unit_of_measurement: °C
    - name: Temperature Forecast 20
      unique_id: temperature_forecast_20
      state: "{{ hourly['weather.forecast_home'].forecast[19].temperature }}"
      unit_of_measurement: °C
    - name: Temperature Forecast 21
      unique_id: temperature_forecast_21
      state: "{{ hourly['weather.forecast_home'].forecast[20].temperature }}"
      unit_of_measurement: °C
    - name: Temperature Forecast 22
      unique_id: temperature_forecast_22
      state: "{{ hourly['weather.forecast_home'].forecast[21].temperature }}"
      unit_of_measurement: °C
    - name: Temperature Forecast 23
      unique_id: temperature_forecast_23
      state: "{{ hourly['weather.forecast_home'].forecast[22].temperature }}"
      unit_of_measurement: °C
Now you should have the needed weather data neatly created as sensors in home assistant. The sensors will be current temps and weather condition and 24 hours forecast of this data as well.
We also need to create a automation that calculates the highest temp and the lowest temp for the day.
alias: Store Forecast High and Low
description: Compute and store today's forecast high and low.
triggers:
  - at: "00:05:00"
    trigger: time
    enabled: true
  - trigger: time_pattern
    hours: /1
actions:
  - variables:
      f2: "{{ states('sensor.temperature_forecast_01') | float(0) }}"
      f3: "{{ states('sensor.temperature_forecast_02') | float(0) }}"
      f4: "{{ states('sensor.temperature_forecast_03') | float(0) }}"
      f5: "{{ states('sensor.temperature_forecast_04') | float(0) }}"
      f6: "{{ states('sensor.temperature_forecast_05') | float(0) }}"
      f7: "{{ states('sensor.temperature_forecast_06') | float(0) }}"
      f8: "{{ states('sensor.temperature_forecast_07') | float(0) }}"
      f9: "{{ states('sensor.temperature_forecast_08') | float(0) }}"
      f10: "{{ states('sensor.temperature_forecast_09') | float(0) }}"
      f11: "{{ states('sensor.temperature_forecast_10') | float(0) }}"
      f12: "{{ states('sensor.temperature_forecast_11') | float(0) }}"
      f13: "{{ states('sensor.temperature_forecast_12') | float(0) }}"
      f14: "{{ states('sensor.temperature_forecast_13') | float(0) }}"
      f15: "{{ states('sensor.temperature_forecast_14') | float(0) }}"
      f16: "{{ states('sensor.temperature_forecast_15') | float(0) }}"
      f17: "{{ states('sensor.temperature_forecast_16') | float(0) }}"
      f18: "{{ states('sensor.temperature_forecast_17') | float(0) }}"
      f19: "{{ states('sensor.temperature_forecast_18') | float(0) }}"
      f20: "{{ states('sensor.temperature_forecast_19') | float(0) }}"
      f21: "{{ states('sensor.temperature_forecast_20') | float(0) }}"
      f22: "{{ states('sensor.temperature_forecast_21') | float(0) }}"
      f23: "{{ states('sensor.temperature_forecast_22') | float(0) }}"
      f24: "{{ states('sensor.temperature_forecast_23') | float(0) }}"
      f25: "{{ states('sensor.temperature_forecast_h1') | float(0) }}"
      f26: "{{ states('sensor.temperature_forecast_h2') | float(0) }}"
      f27: "{{ states('sensor.temperature_forecast_h3') | float(0) }}"
      forecast_values: >-
        {{ [f2, f3, f4, f5, f6, f7, f8, f9, f10, f11, f12, f13, f14, f15, f16,
        f17, f18, f19, f20, f21, f22, f23, f24, f25, f26, f27] }}
      forecast_high: "{{ forecast_values | max }}"
      forecast_low: "{{ forecast_values | min }}"
  - data:
      entity_id: input_number.forecast_high
      value: "{{ forecast_high }}"
    action: input_number.set_value
  - data:
      entity_id: input_number.forecast_low
      value: "{{ forecast_low }}"
    action: input_number.set_value
mode: single
Now back to the YAML configuration in ESPHOME to add the sensors:
sensor:
  - platform: homeassistant
    id: temp_now
    entity_id: sensor.tempcurrent
  - platform: homeassistant
    id: temp_h1
    entity_id: sensor.temperature_forecast_h1
  - platform: homeassistant
    id: temp_h2
    entity_id: sensor.temperature_forecast_h2
  - platform: homeassistant
    id: temp_h3
    entity_id: sensor.temperature_forecast_h3
  - platform: homeassistant
    id: temp_d1
    entity_id: sensor.temperature_forecast_d1
  - platform: homeassistant
    id: temp_d2
    entity_id: sensor.temperature_forecast_d2
  - platform: homeassistant
    id: temp_d3
    entity_id: sensor.temperature_forecast_d3
  - platform: wifi_signal
    name: "WiFi Signal Sensor"
    id: wifisignal
    update_interval: 60s
  - platform: homeassistant
    id: highest_temp
    entity_id: input_number.forecast_high
  - platform: homeassistant
    id: lowest_temp
    entity_id: input_number.forecast_low

text_sensor:
  - platform: homeassistant
    id: weather_now
    entity_id: sensor.weathercurrent
  - platform: homeassistant
    id: weather_h1
    entity_id: sensor.weather_forecast_h1
  - platform: homeassistant
    id: weather_h2
    entity_id: sensor.weather_forecast_h2
  - platform: homeassistant
    id: weather_h3
    entity_id: sensor.weather_forecast_h3
  - platform: homeassistant
    id: weather_d1
    entity_id: sensor.weather_forecast_d1
  - platform: homeassistant
    id: weather_d2
    entity_id: sensor.weather_forecast_d2
  - platform: homeassistant
    id: weather_d3
    entity_id: sensor.weather_forecast_d3
  - platform: homeassistant
    id: person_lisa
    entity_id: person.lisa
  - platform: homeassistant
    id:  person_mikael
    entity_id: person.duux
If we add the following lambda now we can draw the time, date, current temp and weather conditions and display a neat icon representing the weather.
// Map weather states to MDI characters.
std::map<std::string, std::string> weather_icon_map
{
{"cloudy", "\U000F0590"},
{"cloudy-alert", "\U000F0F2F"},
{"cloudy-arrow-right", "\U000F0E6E"},
{"fog", "\U000F0591"},
{"hail", "\U000F0592"},
{"hazy", "\U000F0F30"},
{"hurricane", "\U000F0898"},
{"lightning", "\U000F0593"},
{"lightning-rainy", "\U000F067E"},
{"clear-night", "\U000F0594"},
{"night-partly-cloudy", "\U000F0F31"},
{"partlycloudy", "\U000F0595"},
{"partly-lightning", "\U000F0F32"},
{"partly-rainy", "\U000F0F33"},
{"partly-snowy", "\U000F0F34"},
{"partly-snowy-rainy", "\U000F0F35"},
{"pouring", "\U000F0596"},
{"rainy", "\U000F0597"},
{"snowy", "\U000F0598"},
{"snowy-heavy", "\U000F0F36"},
{"snowy-rainy", "\U000F067F"},
{"sunny", "\U000F0599"},
{"sunny-alert", "\U000F0F37"},
{"sunny-off", "\U000F14E4"},
{"sunset", "\U000F059A"},
{"sunset-down", "\U000F059B"},
{"sunset-up", "\U000F059C"},
{"tornado", "\U000F0F38"},
{"windy", "\U000F059D"},
{"windy-variant", "\U000F059E"},
};
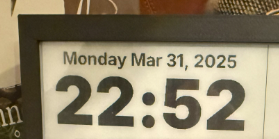
// Date and Time
it.strftime(190, 10, id(small), TextAlign::CENTER_HORIZONTAL, "%A %b %d, %Y", id(homeassistant_time).now());
it.strftime(190, 30, id(big), TextAlign::CENTER_HORIZONTAL, "%H:%M", id(homeassistant_time).now());
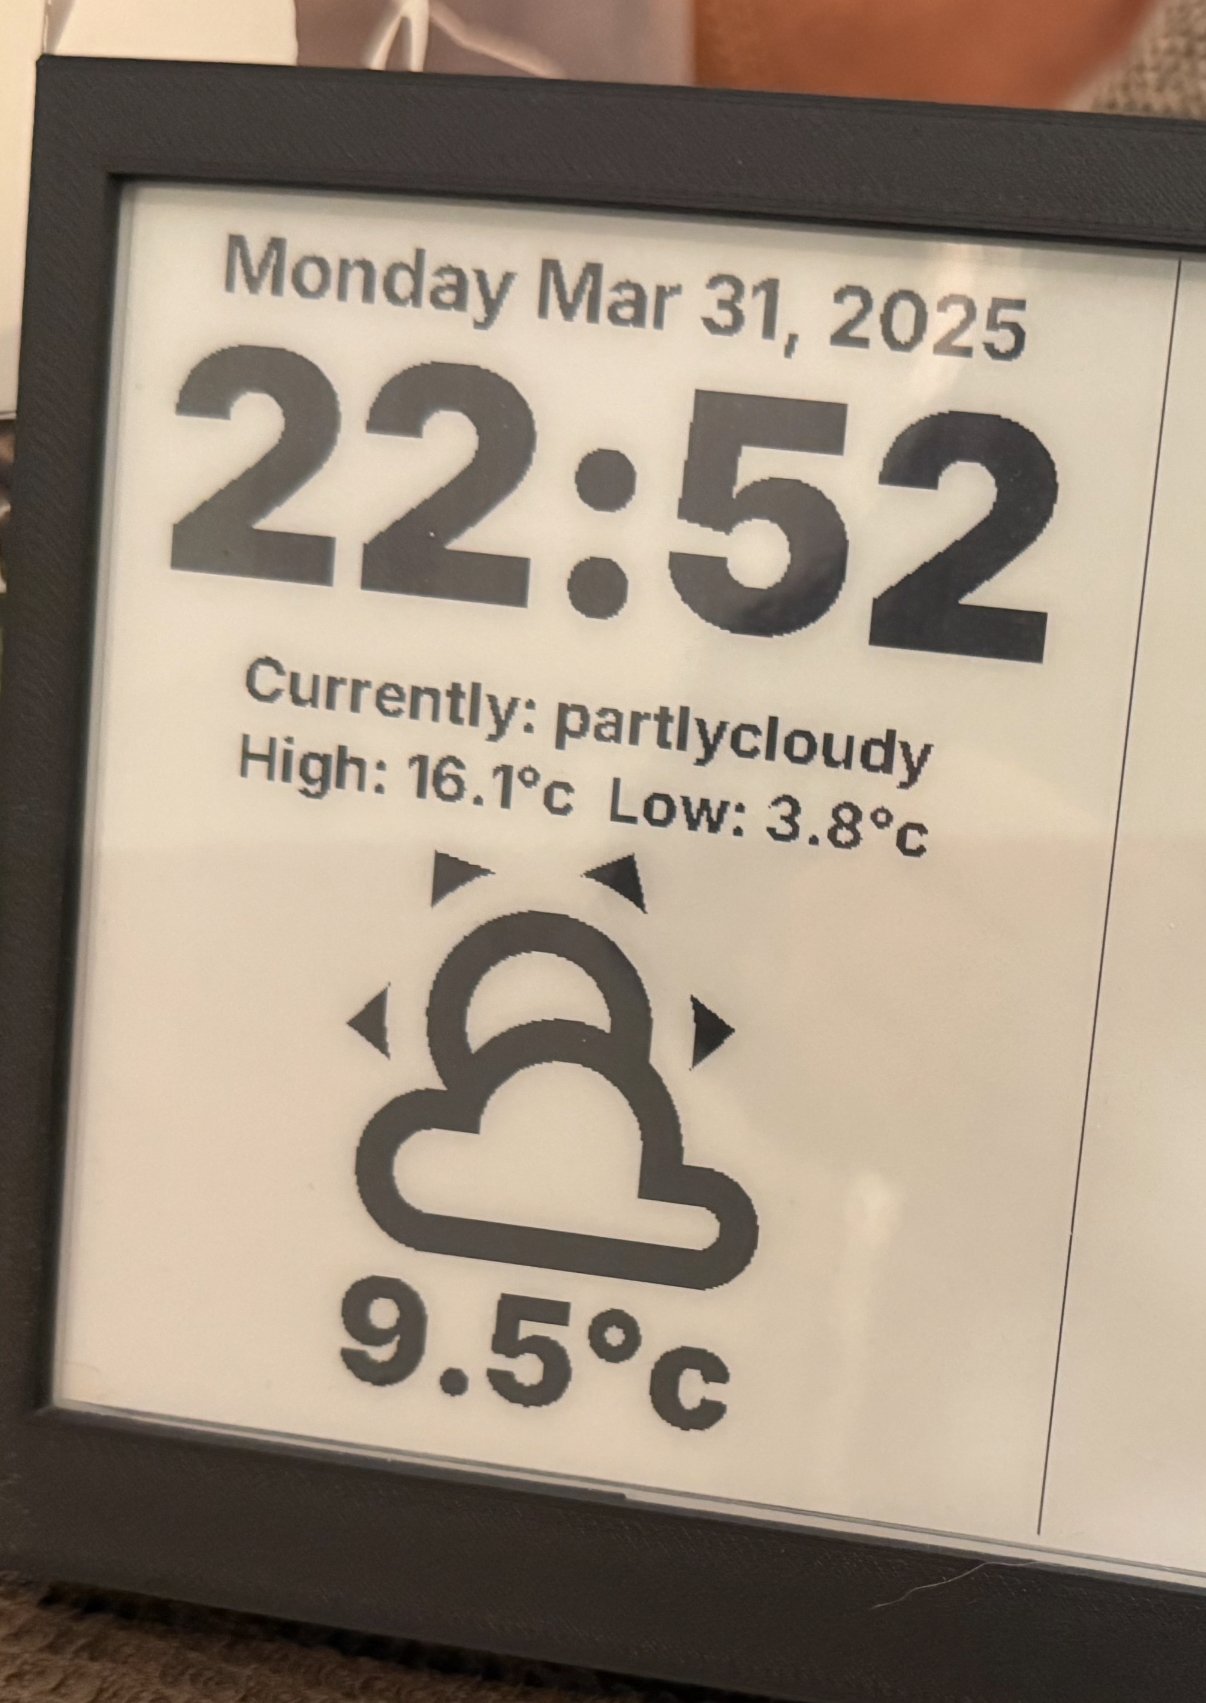
// Current Weather
it.printf(190, 170, id(tiny), TextAlign::CENTER_HORIZONTAL, "Currently: %s", id(weather_now).state.c_str());
it.printf(190, 200, id(tiny), TextAlign::CENTER_HORIZONTAL, "High: %.1f°c Low: %.1f°c", id(highest_temp).state, id(lowest_temp).state);
it.printf(190, 220, id(font_mdi_large), TextAlign::CENTER_HORIZONTAL, "%s", weather_icon_map[id(weather_now).state.c_str()].c_str());
it.printf(190, 400, id(medium), TextAlign::CENTER_HORIZONTAL, "%.1f°c", id(temp_now).state);
it.line(400, 0, 400, 480); // add a nice line in the middel
All that just for the weather data! probably a better way to do it but it works.
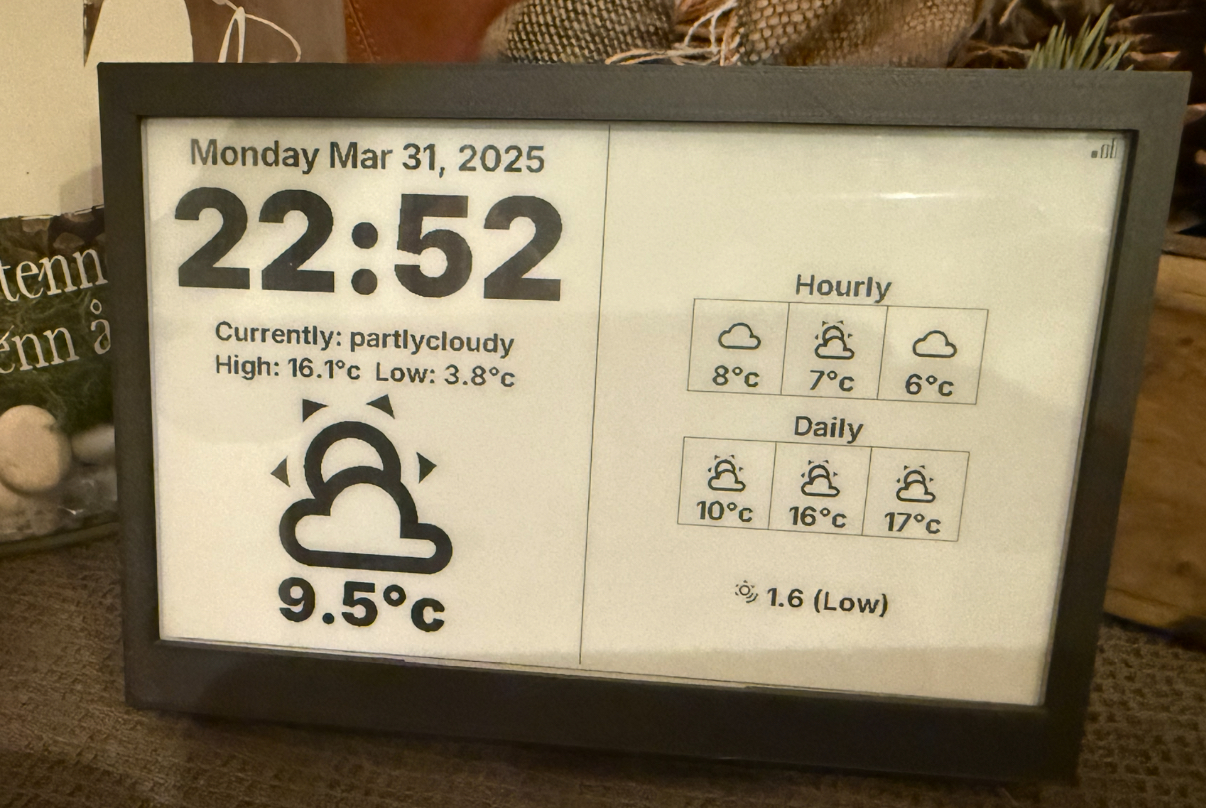
Forecast
If we remove the person sensors from the drawing at this time we can replace it with the hourly and daily forecasts. Don’t worry, we will add the other stuff back in once we get to the pages section.
Under the code that creates the line in the middle of the screen separating the left and the right side of the screen add the following code:
// START OF RIGHT SIDE
// Hourly Forecast
it.printf(600,110, id(tiny), TextAlign::CENTER_HORIZONTAL, "Hourly");
it.printf(520,150,id(font_mdi_medium),TextAlign::CENTER_HORIZONTAL,"%s",weather_icon_map[id(weather_h1).state.c_str()].c_str());
it.printf(600,150,id(font_mdi_medium),TextAlign::CENTER_HORIZONTAL,"%s",weather_icon_map[id(weather_h2).state.c_str()].c_str());
it.printf(680,150,id(font_mdi_medium),TextAlign::CENTER_HORIZONTAL,"%s",weather_icon_map[id(weather_h1).state.c_str()].c_str());
it.printf(520,190,id(tiny),TextAlign::CENTER_HORIZONTAL, "%.0f°c", id(temp_h1).state);
it.printf(600,190,id(tiny),TextAlign::CENTER_HORIZONTAL, "%.0f°c", id(temp_h2).state);
it.printf(680,190,id(tiny),TextAlign::CENTER_HORIZONTAL, "%.0f°c", id(temp_h3).state);
// Daily Forecast
it.printf(600,230,id(tiny),TextAlign::CENTER_HORIZONTAL,"Daily");
it.printf(520,270,id(font_mdi_medium),TextAlign::CENTER_HORIZONTAL,"%s",weather_icon_map[id(weather_d1).state.c_str()].c_str());
it.printf(600,270,id(font_mdi_medium),TextAlign::CENTER_HORIZONTAL,"%s",weather_icon_map[id(weather_d2).state.c_str()].c_str());
it.printf(680,270,id(font_mdi_medium),TextAlign::CENTER_HORIZONTAL,"%s",weather_icon_map[id(weather_d1).state.c_str()].c_str());
it.printf(520,310,id(tiny),TextAlign::CENTER_HORIZONTAL, "%.0f°c", id(temp_d1).state);
it.printf(600,310,id(tiny),TextAlign::CENTER_HORIZONTAL, "%.0f°c", id(temp_d2).state);
it.printf(680,310,id(tiny),TextAlign::CENTER_HORIZONTAL, "%.0f°c", id(temp_d3).state);
// Forecast Boxes Hourly
it.rectangle(480,140,80,80);
it.rectangle(480,140,160,80);
it.rectangle(480,140,240,80);
// Forecast Boxes Daily
it.rectangle(480,260,80,80);
it.rectangle(480,260,160,80);
it.rectangle(480,260,240,80);
Pages
To not clutter the screen anymore and to try and keep it as minimalist as possible we can use what is called pages
It works like this:
display:
  - platform: ...
    # ...
    id: screen
    pages:
      - id: page1
        lambda: |-
          it.print(0, 10, id(my_font), "This is page 1!");
      - id: page2
        lambda: |-
          it.print(0, 10, id(my_font), "This is page 2!");
By adding pages we can have the content on the screen change and separated. We can add a timer and make it change what is displayed on the screen.
By adding this code to the YAML you can automate the page change:
interval:
  - interval: 15s
    then:
      - display.page.show_next: screen
      - component.update: screen
Here is a example of my code using it:
display:
- platform: waveshare_epaper
id: screen
update_interval: never
reset_duration: 2ms
show_test_card: false
model: 7.50inv2
cs_pin: GPIO3
dc_pin: GPIO5
busy_pin: GPIO7
reset_pin: GPIO2
spi_id: spi_stack
rotation: 0
pages:
- id: page1
lambda: |-
// Map weather states to MDI characters.
std::map<std::string, std::string> weather_icon_map
{
{"cloudy", "\U000F0590"},
{"cloudy-alert", "\U000F0F2F"},
{"cloudy-arrow-right", "\U000F0E6E"},
{"fog", "\U000F0591"},
{"hail", "\U000F0592"},
{"hazy", "\U000F0F30"},
{"hurricane", "\U000F0898"},
{"lightning", "\U000F0593"},
{"lightning-rainy", "\U000F067E"},
{"clear-night", "\U000F0594"},
{"night-partly-cloudy", "\U000F0F31"},
{"partlycloudy", "\U000F0595"},
{"partly-lightning", "\U000F0F32"},
{"partly-rainy", "\U000F0F33"},
{"partly-snowy", "\U000F0F34"},
{"partly-snowy-rainy", "\U000F0F35"},
{"pouring", "\U000F0596"},
{"rainy", "\U000F0597"},
{"snowy", "\U000F0598"},
{"snowy-heavy", "\U000F0F36"},
{"snowy-rainy", "\U000F067F"},
{"sunny", "\U000F0599"},
{"sunny-alert", "\U000F0F37"},
{"sunny-off", "\U000F14E4"},
{"sunset", "\U000F059A"},
{"sunset-down", "\U000F059B"},
{"sunset-up", "\U000F059C"},
{"tornado", "\U000F0F38"},
{"windy", "\U000F059D"},
{"windy-variant", "\U000F059E"},
};
// Date and Time
it.strftime(190, 10, id(small), TextAlign::CENTER_HORIZONTAL, "%A %b %d, %Y", id(homeassistant_time).now());
it.strftime(190, 30, id(big), TextAlign::CENTER_HORIZONTAL, "%H:%M", id(homeassistant_time).now());
// Current Weather
it.printf(190, 170, id(tiny), TextAlign::CENTER_HORIZONTAL, "Currently: %s", id(weather_now).state.c_str());
it.printf(190, 200, id(tiny), TextAlign::CENTER_HORIZONTAL, "High: %.1f°c Low: %.1f°c", id(highest_temp).state, id(lowest_temp).state);
it.printf(190, 220, id(font_mdi_large), TextAlign::CENTER_HORIZONTAL, "%s", weather_icon_map[id(weather_now).state.c_str()].c_str());
it.printf(190, 400, id(medium), TextAlign::CENTER_HORIZONTAL, "%.1f°c", id(temp_now).state);
/* WiFi Signal Strenght */
if(id(wifisignal).has_state()) {
int x = 790;
int y = 20;
if (id(wifisignal).state >= -50) {
//Excellent
it.print(x, y, id(mdi_wifi), TextAlign::BASELINE_CENTER, "");
ESP_LOGI("WiFi", "Exellent");
} else if (id(wifisignal).state >= -60) {
//Good
it.print(x, y, id(mdi_wifi), TextAlign::BASELINE_CENTER, "");
ESP_LOGI("WiFi", "Good");
} else if (id(wifisignal).state >= -75) {
//Fair
it.print(x, y, id(mdi_wifi), TextAlign::BASELINE_CENTER, "");
ESP_LOGI("WiFi", "Fair");
} else if (id(wifisignal).state >= -100) {
//Weak
it.print(x, y, id(mdi_wifi), TextAlign::BASELINE_CENTER, "");
ESP_LOGI("WiFi", "Weak");
} else {
//Unlikely working signal
it.print(x, y, id(mdi_wifi), TextAlign::BASELINE_CENTER, "");
ESP_LOGI("WiFi", "Unlikely");
}
}
it.line(400, 0, 400, 480);
// END OF LEFT SIDE
// START OF RIGHT SIDE
// Hourly Forecast
it.printf(600,110, id(tiny), TextAlign::CENTER_HORIZONTAL, "Hourly");
it.printf(520,150,id(font_mdi_medium),TextAlign::CENTER_HORIZONTAL,"%s",weather_icon_map[id(weather_h1).state.c_str()].c_str());
it.printf(600,150,id(font_mdi_medium),TextAlign::CENTER_HORIZONTAL,"%s",weather_icon_map[id(weather_h2).state.c_str()].c_str());
it.printf(680,150,id(font_mdi_medium),TextAlign::CENTER_HORIZONTAL,"%s",weather_icon_map[id(weather_h1).state.c_str()].c_str());
it.printf(520,190,id(tiny),TextAlign::CENTER_HORIZONTAL, "%.0f°c", id(temp_h1).state);
it.printf(600,190,id(tiny),TextAlign::CENTER_HORIZONTAL, "%.0f°c", id(temp_h2).state);
it.printf(680,190,id(tiny),TextAlign::CENTER_HORIZONTAL, "%.0f°c", id(temp_h3).state);
// Daily Forecast
it.printf(600,230,id(tiny),TextAlign::CENTER_HORIZONTAL,"Daily");
it.printf(520,270,id(font_mdi_medium),TextAlign::CENTER_HORIZONTAL,"%s",weather_icon_map[id(weather_d1).state.c_str()].c_str());
it.printf(600,270,id(font_mdi_medium),TextAlign::CENTER_HORIZONTAL,"%s",weather_icon_map[id(weather_d2).state.c_str()].c_str());
it.printf(680,270,id(font_mdi_medium),TextAlign::CENTER_HORIZONTAL,"%s",weather_icon_map[id(weather_d1).state.c_str()].c_str());
it.printf(520,310,id(tiny),TextAlign::CENTER_HORIZONTAL, "%.0f°c", id(temp_d1).state);
it.printf(600,310,id(tiny),TextAlign::CENTER_HORIZONTAL, "%.0f°c", id(temp_d2).state);
it.printf(680,310,id(tiny),TextAlign::CENTER_HORIZONTAL, "%.0f°c", id(temp_d3).state);
// Forecast Boxes Hourly
it.rectangle(480,140,80,80);
it.rectangle(480,140,160,80);
it.rectangle(480,140,240,80);
// Forecast Boxes Daily
it.rectangle(480,260,80,80);
it.rectangle(480,260,160,80);
it.rectangle(480,260,240,80);
// UV Index
std::map<std::string, std::string> uv_string_map
{
{"extreme", "Extreme"},
{"very_high", "Very High"},
{"high", "High"},
{"moderate", "Moderate"},
{"low", "Low"},
};
if (id(uv_index).has_state()) {
it.printf(600,400, id(tiny), TextAlign::CENTER, "\U000F17FF %.1f (%s)", id(uv_index).state, uv_string_map[id(uv_level).state.c_str()].c_str());
}
- id: page2
lambda: |-
// Map weather states to MDI characters.
std::map<std::string, std::string> weather_icon_map
{
{"cloudy", "\U000F0590"},
{"cloudy-alert", "\U000F0F2F"},
{"cloudy-arrow-right", "\U000F0E6E"},
{"fog", "\U000F0591"},
{"hail", "\U000F0592"},
{"hazy", "\U000F0F30"},
{"hurricane", "\U000F0898"},
{"lightning", "\U000F0593"},
{"lightning-rainy", "\U000F067E"},
{"clear-night", "\U000F0594"},
{"night-partly-cloudy", "\U000F0F31"},
{"partlycloudy", "\U000F0595"},
{"partly-lightning", "\U000F0F32"},
{"partly-rainy", "\U000F0F33"},
{"partly-snowy", "\U000F0F34"},
{"partly-snowy-rainy", "\U000F0F35"},
{"pouring", "\U000F0596"},
{"rainy", "\U000F0597"},
{"snowy", "\U000F0598"},
{"snowy-heavy", "\U000F0F36"},
{"snowy-rainy", "\U000F067F"},
{"sunny", "\U000F0599"},
{"sunny-alert", "\U000F0F37"},
{"sunny-off", "\U000F14E4"},
{"sunset", "\U000F059A"},
{"sunset-down", "\U000F059B"},
{"sunset-up", "\U000F059C"},
{"tornado", "\U000F0F38"},
{"windy", "\U000F059D"},
{"windy-variant", "\U000F059E"},
};
// Date and Time
it.strftime(190, 10, id(small), TextAlign::CENTER_HORIZONTAL, "%A %b %d, %Y", id(homeassistant_time).now());
it.strftime(190, 30, id(big), TextAlign::CENTER_HORIZONTAL, "%H:%M", id(homeassistant_time).now());
// Current Weather
it.printf(190, 170, id(tiny), TextAlign::CENTER_HORIZONTAL, "Currently: %s", id(weather_now).state.c_str());
it.printf(190, 200, id(tiny), TextAlign::CENTER_HORIZONTAL, "High: %.1f°c Low: %.1f°c", id(highest_temp).state, id(lowest_temp).state);
it.printf(190, 220, id(font_mdi_large), TextAlign::CENTER_HORIZONTAL, "%s", weather_icon_map[id(weather_now).state.c_str()].c_str());
it.printf(190, 400, id(medium), TextAlign::CENTER_HORIZONTAL, "%.1f°c", id(temp_now).state);
/* WiFi Signal Strenght */
if(id(wifisignal).has_state()) {
int x = 790;
int y = 20;
if (id(wifisignal).state >= -50) {
//Excellent
it.print(x, y, id(mdi_wifi), TextAlign::BASELINE_CENTER, "");
ESP_LOGI("WiFi", "Exellent");
} else if (id(wifisignal).state >= -60) {
//Good
it.print(x, y, id(mdi_wifi), TextAlign::BASELINE_CENTER, "");
ESP_LOGI("WiFi", "Good");
} else if (id(wifisignal).state >= -75) {
//Fair
it.print(x, y, id(mdi_wifi), TextAlign::BASELINE_CENTER, "");
ESP_LOGI("WiFi", "Fair");
} else if (id(wifisignal).state >= -100) {
//Weak
it.print(x, y, id(mdi_wifi), TextAlign::BASELINE_CENTER, "");
ESP_LOGI("WiFi", "Weak");
} else {
//Unlikely working signal
it.print(x, y, id(mdi_wifi), TextAlign::BASELINE_CENTER, "");
ESP_LOGI("WiFi", "Unlikely");
}
}
it.line(400, 0, 400, 480);
// END OF LEFT SIDE
// START OF RIGHT SIDE
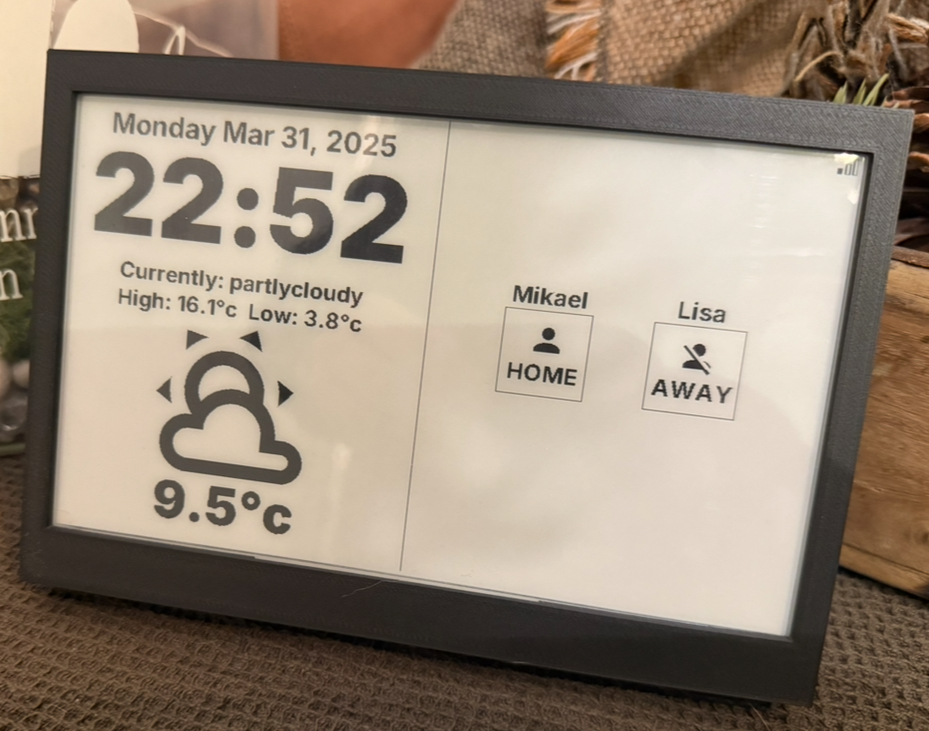
// Persons
// Map Person State
std::map<std::string, std::string> person_map
{
{"home", "\U000F0004"},
{"not_home", "\U000F0012"},
};
it.printf(523,150, id(tiny), TextAlign::CENTER_HORIZONTAL, "Mikael");
it.printf(673,150, id(tiny), TextAlign::CENTER_HORIZONTAL, "Lisa");
it.printf(525,190,id(font_mdi_medium),TextAlign::CENTER_HORIZONTAL,"%s",person_map[id(person_mikael).state.c_str()].c_str());
it.printf(675,190,id(font_mdi_medium),TextAlign::CENTER_HORIZONTAL,"%s",person_map[id(person_lisa).state.c_str()].c_str());
if (id(person_mikael).state == "home") {
it.printf(525,230,id(tiny),TextAlign::CENTER_HORIZONTAL, "HOME");
}
else {
it.printf(525,230,id(tiny),TextAlign::CENTER_HORIZONTAL, "AWAY");
}
if (id(person_lisa).state == "home") {
it.printf(675,230,id(tiny),TextAlign::CENTER_HORIZONTAL, "HOME");
}
else {
it.printf(675,230,id(tiny),TextAlign::CENTER_HORIZONTAL, "AWAY");
}
// Draw boxes
it.rectangle(480,180,90,90);
it.rectangle(630,180,90,90);
As you can see I am drawing the WiFi Signal and all of the right side in both of the pages as i want that to be on all of my pages and i only change out what is on the left side of the screen. That way you get the feeling that only the left side is changing and the left side will only change between the weather forecast and the person sensors from home assistant.
Page1

Page2
Other page ideas
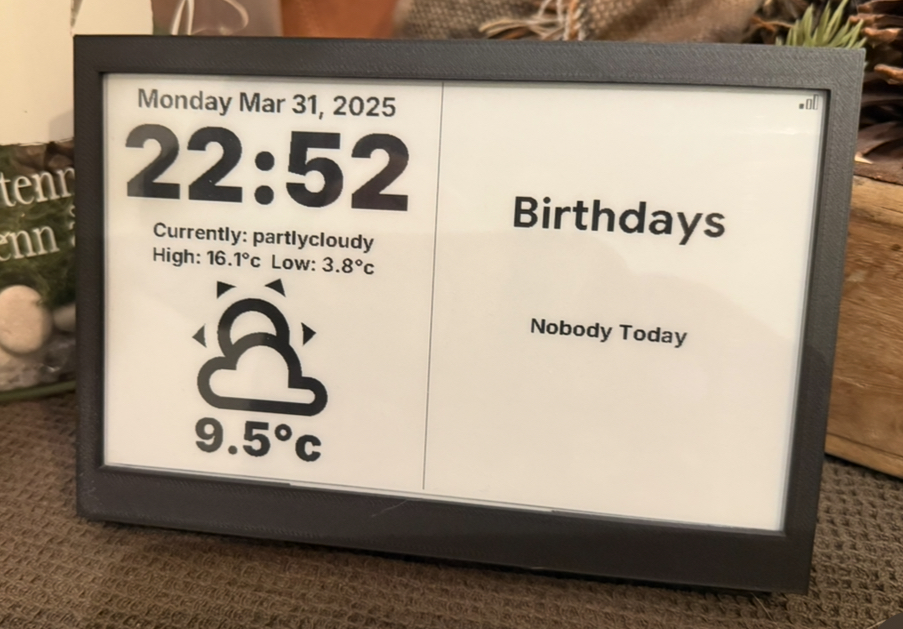
Birthdays
You can also show birthdays on the screen
// START OF RIGHT SIDE
// Birthday functions
std::map<std::string, std::vector<std::string>> birthday_map {
  {"06.05", {"Mikael", "X"}},
  {"22.12", {"X"}}, // masked out the names here with X
  {"15.07", {"X"}},
  {"08.07", {"X"}},
  {"20.07", {"X"}},
  {"23.12", {"X"}},
  {"16.02", {"X"}},
  {"17.03", {"X"}},
  {"02.10", {"X"}},
  {"22.11", {"X"}},
  {"31.10", {"X"}},
  {"06.03", {"X"}},
  {"20.08", {"X"}},
  {"18.03", {"X"}},
};
// Get today's date as "DD.MM"
time_t now = id(homeassistant_time).now().timestamp;
struct tm* timeinfo = localtime(&now);
char today_str[6]; // "DD.MM" + null terminator
strftime(today_str, sizeof(today_str), "%d.%m", timeinfo);
std::string today = today_str;
it.printf(600,110, id(font_value), TextAlign::CENTER_HORIZONTAL, "Birthdays");
// Check if there are any birthdays today
auto iter = birthday_map.find(today);
if (iter != birthday_map.end()) {
  int y_offset = 270;
  it.printf(600, 180, id(font_mdi_side_high), TextAlign::CENTER_HORIZONTAL, "\U000F00EB");
  // Iterate through all names for today
  for (const std::string& name : iter->second) {
	  it.printf(600, y_offset, id(tiny), TextAlign::CENTER_HORIZONTAL, "%s", name.c_str());
	  y_offset += 40; // Increase vertical spacing for each name
  }
} else {
  it.printf(600, 270, id(tiny), TextAlign::CENTER, "Nobody Today");
}
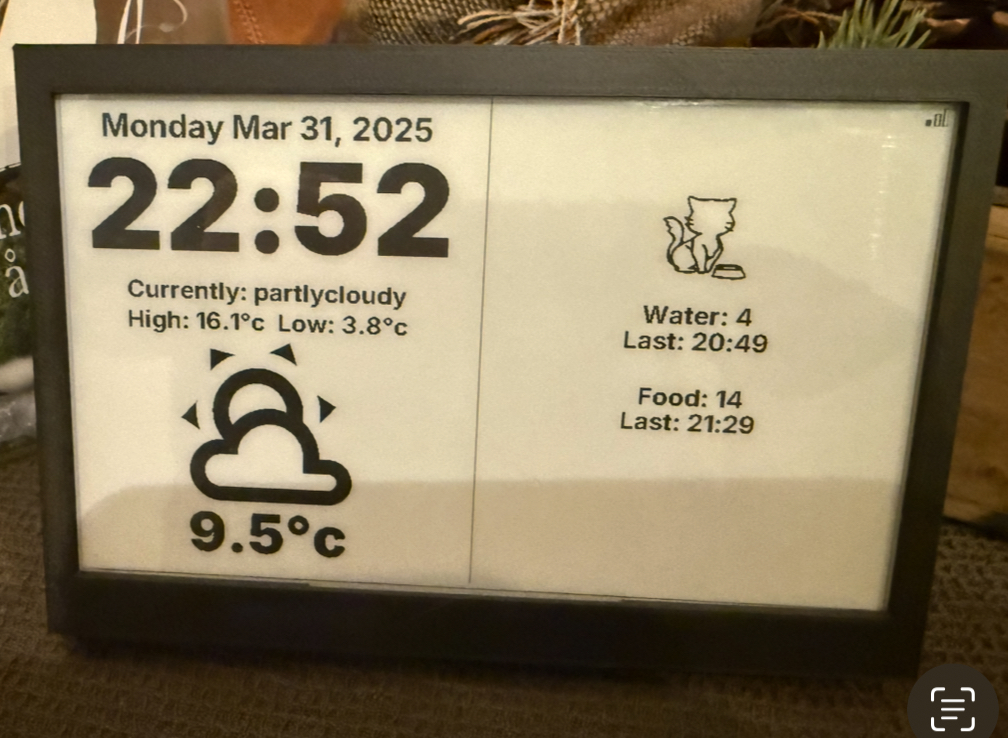
Cat water and food sensors
As I have detection sensors on the food and water bawl for the cat, I can track his usage and display it on the screen.
// START OF RIGHT SIDE
// CAT STUFF
it.printf(600, 70, id(meow_80), TextAlign::CENTER_HORIZONTAL, "t");
it.printf(600, 180, id(tiny), TextAlign::CENTER_HORIZONTAL, "Water: %.0f", id(cat_water_counter).state);
it.printf(600, 260, id(tiny), TextAlign::CENTER_HORIZONTAL, "Food: %.0f", id(cat_food_counter).state);
auto water_last = id(cat_water_last).state;
if (water_last.length() >= 16) {
  std::string time_str = water_last.substr(11, 5);  // Extract "HH:MM"
  it.printf(600, 205, id(tiny), TextAlign::CENTER_HORIZONTAL, "Last: %s", time_str.c_str());
} else {
  it.printf(600, 205, id(tiny), TextAlign::CENTER_HORIZONTAL, "Last: %s", water_last.c_str());
}
auto food_last = id(cat_food_last).state;
if (food_last.length() >= 16) {
  std::string time_str = food_last.substr(11, 5);
  it.printf(600, 285, id(tiny), TextAlign::CENTER_HORIZONTAL, "Last: %s", time_str.c_str());
} else {
  it.printf(600, 285, id(tiny), TextAlign::CENTER_HORIZONTAL, "Last: %s", food_last.c_str());
}
And its related sensors:
sensor:
  - platform: homeassistant
    id: cat_food_counter
    entity_id: counter.cat_food_counter
  - platform: homeassistant
    id: cat_water_counter
    entity_id: counter.cat_water_counter
text_sensor:
  - platform: homeassistant
    id: cat_food_last
    entity_id: input_datetime.last_cat_food_trigger
  - platform: homeassistant
    id: cat_water_last
    entity_id: input_datetime.last_cat_water_trigger
Trigger from Home Assistant
You can also create actions that you can trigger in automation’s by adding services to the YAML in ESPHOME:
# Enable Home Assistant API
api:
  encryption:
    key: "SUPERSECRETAPICODEYO!"
  services:
    - service: update_display
      then:
        - component.update: screen
That way you can create automation’s in home assistant:
alias: Update E-Paper Display on Weather Change
description: Trigger display update when the weather sensor changes.
triggers:
  - entity_id: sensor.weathercurrent
    trigger: state
actions:
  - action: esphome.epapir_dashboard_update_display
    data: {}
mode: single
Conclusion
This was a really fun project to dive in to and I learned a lot by tinkering with it. Hope I didn’t miss any critical information as I am writing this post project. If you have any questions, my contact info is on the left.